The handstand is one of yoga’s most visually impressive and technically challenging asanas, making it such a valued accomplishment for any yoga practitioner. Achieving it calls for plenty of power, control, mobility, and body awareness.
Some reasons you cannot do a handstand include being overly fearful, placing your arms too far apart, not strengthening their core, and more. You can easily fix these issues by building your core strength, rescuing over- and under-balances, focusing on the right body parts, and other measures.
In this piece, we’re going to delve into these reasons and figure out how they may be overcome. The Adho Mukha Vrksasana or Downward Facing Tree Pose is a remarkable achievement that every student of yoga should be able to enjoy. Let’s hope this helps you get there.
You’re Spacing Your Hands Too Far Apart
When trying out handstands for the first time, most people will tend to place the palms of their hands too far apart from each other. This is likely because our fundamental physics logic tells us that wider bases translate to more stability.
With handstands, this doesn’t apply. You will probably only be able to support yourself for less than a second before crumbling in a heap. For extended support and handstand success, the right spacing to have between the palms of your hand will be much smaller than you might expect.
A typical distance might be somewhere in the range of 12 inches, measuring from the tips of your middle fingers. This distance will vary from person to person because the idea is to have your arms pointed straight down from your shoulders to the ground.
The logic behind this is that you want your weight to be entirely supported by your vertical arms, which will allow for much sturdier support. Your body weight will be transmitted straight down into the ground without causing sideways force, as happens when your arms are at an angle.
Fixing the Problem
If you’ve got a partner to work on your handstand with, ask them to observe your form and let you know when you’ve brought your arms close enough together to have them make two parallel vertical lines from your shoulder to the ground.
To fix this distance in your mind, try and make a mental image of the visible distance between them using such contextual indicators such as the number of floorboards between them or have a bit of string stretched out so you can mark the exact length.
Do not worry if it takes you some time to get used to this, it doesn’t come very naturally to those of us who’ve made it a habit to spend our time with our feet firmly on the ground rather than in the air. Give yourself time. With continued practice, this distance will become natural to you as it is what will feel most comfortable to whenever you assume the handstand position.
You Lack Core Strength
Core strength is of prime importance for getting our bodies to remain rigid, tight, and still, which is how a good handstand will look. Core stability goes hand-in-hand with body awareness.
Fixing the Problem
When your hips, legs, ribs, and other body parts are being adjusted as you try to find or maintain your balance, your handstand very quickly fails. Body awareness can be cultivated using the same techniques that core strength is built up.
These are known as stability and isometric drills. They serve to activate the relevant muscles and muscle groups for the execution of a handstand. They will also awaken the mind-body link that is essential for comfortable and sustained balance.
Your Shoulders Are Rigid
Executing a successful handstand requires that you form a straight line with your body, but this becomes impossible if you cannot rotate your shoulders a full 180 degrees over your head. The openness of your shoulders determines this ability.
When your shoulders are tight or closed in this fashion, you will somehow be forced to accommodate for their shortcoming. You might curve your back, throwing your shoulders forward so that they are in front of your wrists. Bend your elbows as well, or make some combination of these measures.
The result is that your body will not be appropriately aligned as is required. Your body will be faced with a much more difficult task trying to keep everything in the air. This struggle makes it almost impossible to achieve a steady handstand.
Fixing the Problem
It has to be said that our shoulders are highly mobile in so far as the average person’s usage of them, but handstands call for flexibility on a different plane of action than our day-to-day lives call for. You will have to practice exercises or poses that help increase your shoulders’ mobility and integration.
Paying Too Much Attention to the Wrong Body Parts
You need to pay close attention to your body to know what adjustments to make as you try and maintain your balance during a handstand, but you have to know which body parts will give you the most useful feedback.
Beginners will often assume that they need to keep track of their legs’ positioning to see whether they are balancing or not. This is not a useful indicator of your state of balance and can keep you from noticing your body’s regions that transmit the most relevant information.
Fixing the Problem
The critical body parts to listen to when in the handstand position are the palms of your hands. This makes sense when you consider that these are the only parts of your body that are in direct contact with the ground, meaning that these are the parts with the most impact on your body status – everything else flows from them.
To make sense of the information, your hands will be giving you a bit of practice as you get used to focusing your awareness on them. Get into the handstand pose and try to focus your attention on your hands. Don’t worry; even if your form is not really in alignment yet, keep your mind on your hands.
Your palms and fingers carry your weight, which is distributed over them. Try and sense where the most weight is being concentrated. If you feel most pressure on your fingertips, this is a sign that you are overbalancing and at risk of toppling over.
Should you feel the most weight in the heels of your hands, then you are probably underbalanced and about to fall back on your feet. The sweet spot to aim for is the middle of your palms, right at the base of your fingers. From here, you have some margin of error going in both directions.
Holding your focus on balancing your weight on this band along your hands lies at the heart of this pose’s meditative essence. It is an excellent example of how body awareness is developed and enhanced through yoga practice. It is often a pleasant surprise for many who find that their handstands become significantly more stable and comfortable.
Not Rescuing Your Overbalances
In practice sessions, you don’t have to worry too much about overbalancing when you’re working against the wall, but this will change when you’re working in the open with no wall to stop your progress. What happens then?
You might choose to save yourself from a fall by transitioning into a cartwheel and flipping down safely, but why not fight for your handstand instead?
If you’ve figured out how to listen to the sensations coming from the palms of your hands when keeping yourself in balance, then you will know that there is a lot you can do with your hands during a handstand. You can stop yourself from falling overusing your hands should you need to, but many people do not.
Fixing the Problem
You can rescue an overbalancing handstand from disaster by using the tips of your fingers to push down hard against the ground, effectively serving the purpose of a wall in stopping your forward movement.
As you can imagine, this calls for quite a bit of strength. Learning how to save yourself in this way will call for you to strengthen the muscles of your forearms, fingers, and hands so that they can take the extra work of being your emergency brakes.
Not Rescuing Your Underbalances
On the other side of the scale are the chances of not kicking up hard enough, causing you to descend back down to the ground before you reach the top of your handstand. It is not so scary to some as overbalancing, but it still means that your handstand is a bust, so nobody likes it.
Using your fingers to stop your forward momentum is not an option here, so what can be done to combat under balancing?
Fixing the Problem
Snatching your handstand from the brink of an under balancing disaster is not so much a question of physical strength or skill, which you can develop, but one of body awareness and quick thinking.
You can rescue your underbalanced handstand by taking action before the situation goes past the point of no return. This is what your bodily awareness will help you with. As soon as you notice that your weight is not correctly distributed by feeling the pressure on your hands’ palms, you can move on to taking corrective measures.
These measures involve sucking in one’s stomach, growing the shoulders forward, adjusting the shape of their body, and bending the elbows. These measures all work in their way to help shift your body’s balance just enough to help you get vertical without changing your posture too drastically.
Fear of Falling Over
One of the reasons the handstand is such an impressive and appealing pose in yoga is that it seems like a dangerous proposition to those unfamiliar with it. The fear of falling and getting hurt keeps many from achieving their handstand in short order.
The main point of concern can be identified as the kicking-up phase. Getting your feet where they need to be for this pose requires that you expend a specific amount of force. Kick up too hard, and you will topple over on the other side (overbalancing), but kick up without enough force, and you won’t make it to the point where your body is completely vertical.
Fear of falling keeps many from finding out their sweet spot. Overcoming this fear is a must for anyone who hopes to find the amount of force that will work for them.
Fixing the Problem
This is a problem whose solution is very straightforward but which remains an obstacle for many. The best way to deal with fear is to overcome it, but we understand that this is easier said than done. To help you work through your fear, you should learn safe ways to recover if you find yourself under- or overbalanced.
Have your instructor teach you how to twist or cartwheel out of unsuccessful kick-ups if you’re unsure whether or not you can figure it out on your own. It involves merely reorienting your body once you notice that you are shooting further than your target. You’ll end up doing a rather clumsy cartwheel rather than falling over entirely.
You Body Isn’t Getting Vertical
In truth, even though we tell you that handstands need a straight alignment of the body to work, it isn’t a strict requirement. There are all types of handstand variations involving many body shapes being balanced on the arms alone.
The reason yoga teaches us this particular technique is that it is by far the most efficient technique of them all. A vertical inversion with the body strictly aligned in a straight line will concentrate the body’s weight directly on top of your center of balance, making it very easy for you to hold your pose.
Misalignment will force you to expend more effort in counterbalancing your body weight distribution and maintaining stability. Acrobats, break-dancers, and circus performers like the spectacle of twisted, contorted, or arched body handstands, but we’re not trying to be flashy here. With plenty of time and practice, you might be able to pull these types of poses, but the straight body handstand works best for the yoga student.
You will need to get your body correctly aligned in a straight line for the most efficient handstand, which many people struggle with.
Fixing the Problem
Getting your body properly aligned is a simple matter of getting it used to the feeling of being completely straight. So many people suffer from poor posture that being correctly aligned is a strange and new sensation.
Alignment drills such as laying down flat on the ground or with your back against a wall can help you get used to being perfectly straightened. Your muscles will know which ones need to be activated and which ones need to be relaxed to achieve proper alignment.
Poses and Stretches to Build Your Handstand Capabilities
Luckily for all aspiring upside-downers out there, there are plenty of yoga poses and stretches that can be implemented to help us develop our ability to execute a proper and sustainable handstand. These are geared towards building a solid foundation of strength and openness that this pose demands.
Building Shoulder Strength
Domed High Plank
Get into a high plank position and make a dome with the top of your back by firmly pressing down on the ground and allowing your shoulder blades to slip away from each other and hold. Doing this activates the muscles responsible for shoulder stability and builds overall shoulder strength.
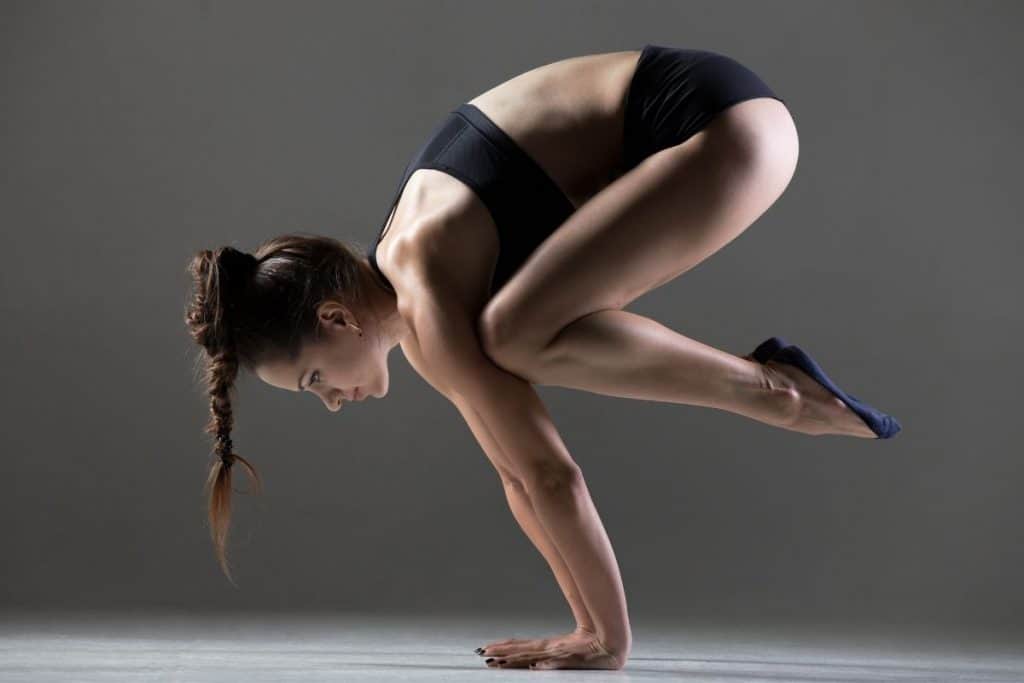
Bakasana – Crow Pose
With your hands separated by the width of your shoulders on the mat, bring up your knees so that they touch the backs of your arms. Press down on the ground as you simultaneously bend your arms so that they form a shelf. Your chest and gaze should then move forward as you begin to slowly float your feet off the ground, eventually getting your toes to touch your bottom.
Shoulder Press-Ups
Start with your hands and knees on the mat. Maintain your hips positioned over your knees and your shoulders directly over your hands. Your core should be engaged during all this. On your exhale, relax your shoulders and allow them to slide towards each other on your back.
Proceed to switch them on now, pressing the floor away without moving any other body part except for the shoulder blades. Repeat the process 20 times. Should you find that you can accomplish this easily, try performing the technique with your knees raised off the mat.
Building Shoulder Flexibility
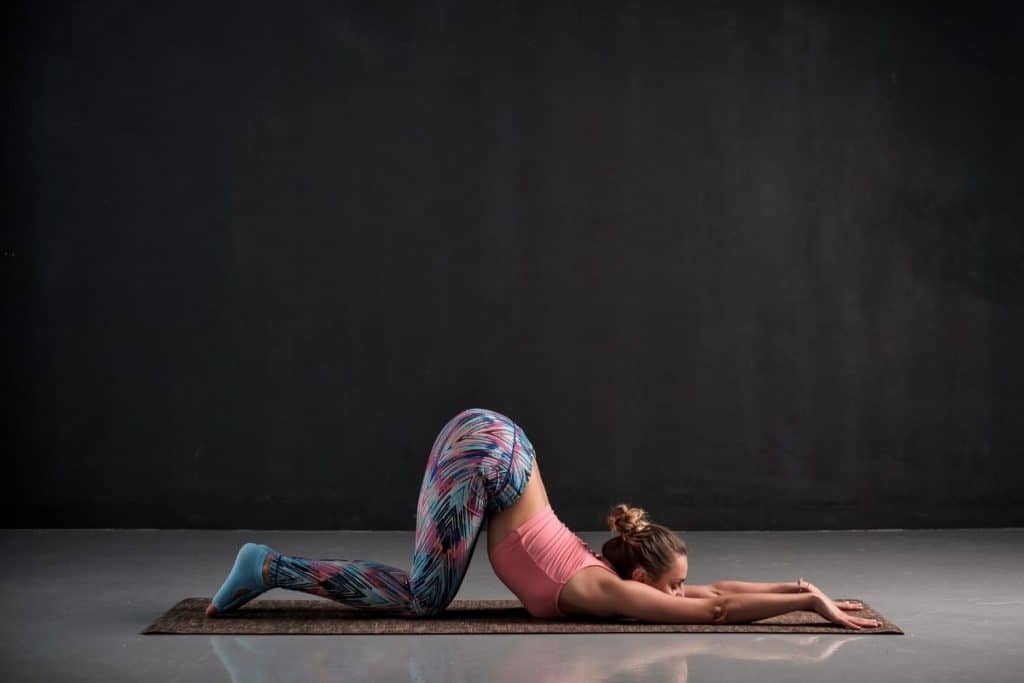
- Puppy pose: From a kneeling position with your hips directly over your knees, bring down your chest towards the floor while stretching your hands in front of you. Hold this pose. You can deepen the effectiveness of this posture by using yoga blocks underneath your arms so that they are raised higher. Alternatively, try bending your arms at the elbows into the prayer position at the back of your head.
Building Core Strength
Navasana – Boat Pose
From a seated position with your knees bent and feet placed flat on the mat, place the palms of your hands behind your knees and press your bottom firmly onto the mat. This serves to lengthen your spine upwards and lift your chest.
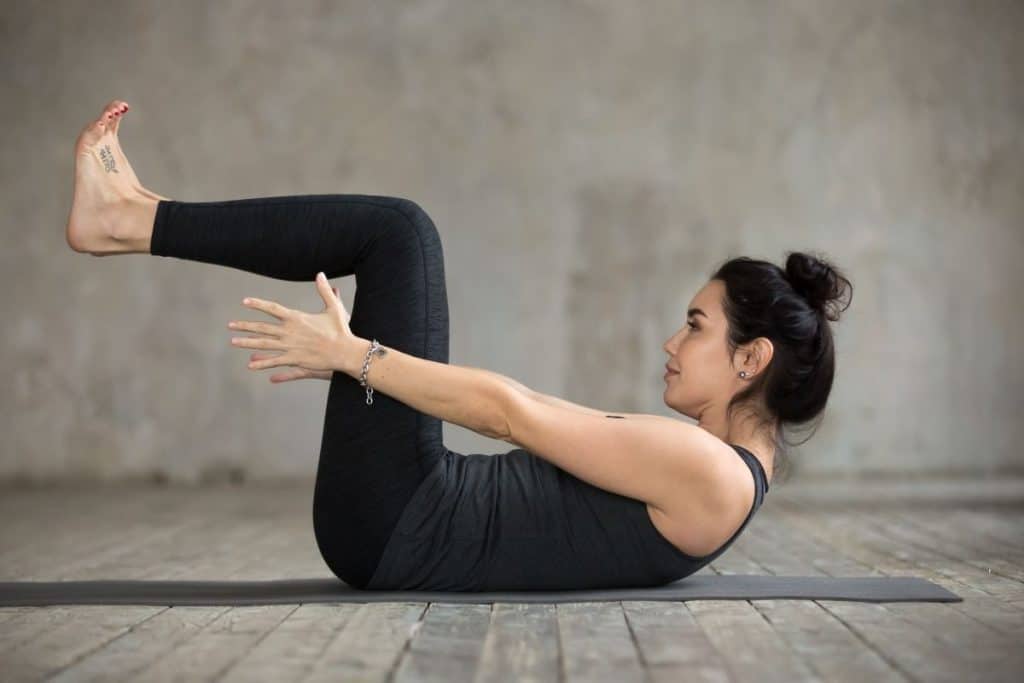
Relax your shoulders and activate your core muscles by drawing in your navel towards your spine. While inhaling, lean slightly back and lift your feet off the mat. Your shins should become parallel with the mat. Hold this pose balancing on your seat with your legs at hip-distance apart.
Building Wrist Strength
- Flicks: With your arms straight out at shoulder height in front of you, ball your hands into fists, then flick open your fingers as quickly as you can. Repeating this as rapidly as you can for around 30 to 60 seconds will quickly give you an intense forearm workout.
- Pulls: These are, essentially, a reversal of the flicks we’ve mentioned above. Instead of opening your palms, you’ll be closing them as quickly as you can in rapid succession. The difference here is that you will have your arms raised over your head to be ‘calling the rain’ as you perform this technique.
- Piano Fingers: Starting on your hands and knees, engage your core and shoulders but keep them motionless. Use the power of your fingers only to raise the palm of your hand off the mat. Your fingers, lying flat on the mat, will be supporting your upper body. Hold this pose for 20 seconds before lowering yourself back down and repeat the sequence 20 times for a useful session.
Building Shoulder Integration
Seat yourself in a comfortable position and extend your arms in front of you to be at the same horizontal plane as your shoulders. Flex your wrists and imagine yourself pushing against a wall to activate your arms.
Draw your arm’s upper bones back into your shoulder sockets, then bring your arms together at your body’s midline while keeping them level with your shoulders. Broaden your chest by moving your collarbones into a curved shape (as though they were smiling).
Hold your body in this position for as long as you are comfortable with it to allow your body to develop muscle memory, which it will draw on once you are in your handstand pose.
Building Hamstring Flexibility
Uttanasana – Standing Forward Fold
Hamstring flexibility plays a significant role in handstand execution, especially during the kick up phase. Start with your feet at hip-distance apart. Keep your knees limber as you hinge forward at the hips, keeping your spine elongated.
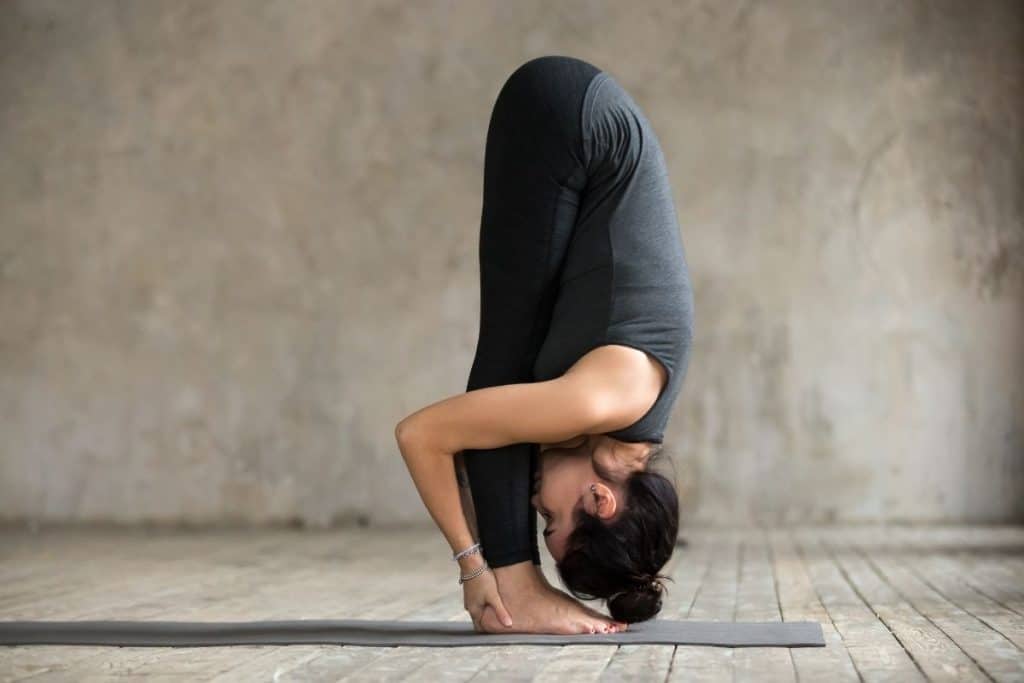
Your head and torso should be allowed to hang heavily downward. If you’re able to achieve this pose with your legs straight, try engaging your quadriceps (the muscles running from your waist to your kneecaps) to give your hamstrings a more intensive stretch.
Note: There are plenty of poses and exercises out there aside from the one we’ve mentioned here for you to explore and try out. Find what works best for you according to your skill level and physical condition.
Why Learn the Yoga Handstand?
Aside from how awesome it looks, the yoga handstand offers plenty of physical, mental, and spiritual benefits to its practitioners. Let’s take a look at some of these.
Physical Benefits
When we root the palms of our hands on the yoga mat while executing a handstand, we challenge our body’s equilibrium and sense of balance. The effects of gravity, which we live under the rest of the time, are alleviated and reversed.
These effects are the compression and shortening of our spinal columns. This position increases the rate of blood flowing to our brains and engages our necks.
Moreover, the reversal of blood flow experienced in our legs and abdominal regions promotes tissue regeneration and vitality. The weight we carry in our visceral tissues and organs will lie upon the diaphragm and exert pressure on it, aiding in deeper exhalations and carbon dioxide elimination from our system.
Handstands will help strengthen our wrists, shoulders, and arms in addition to stretching our abdomens. Achieving a successful handstand can be considered a tangible sign of your bodily awareness and control.
Mental Benefits
The increased blood flow to the brain means that more oxygen and nutrients will be getting to this vital organ than it usually does. This increases brain health or cognitive function, measured in terms of memory, concentration, and problem-solving ability. In general, yoga will help achieve this aim, but this is one of the poses whose cognitive benefits can be readily traced.
This pose will also help alleviate the symptoms of stress and anxiety, which go hand in hand with the markers of depression. When you get your body into a handstand pose, your mind and body renew their relation to one another, and this renewed equilibrium can serve to alleviate whatever mental sticking points you may be dealing with.
Spiritual Benefits
The crown or Sahasrara chakra in yoga is considered to be the most subtle and important one. Traditional yoga practice aims to gather energy from all lower chakras and release it through the head to achieve nirvana.
Achieving nirvana is a more practical aim to strive for than most of us assume. It allows us to get closer to achieving the oneness with all things external and internal that makes for a good life on all levels. The handstand pose is one of the most effective postures you can execute to connect to your higher self.
Final Thoughts
While the handstand cannot be advocated as a suitable posture for complete beginners, it makes a great target project for ongoing students. In many instances, the handstand indicates that a student has mastered the basic yoga poses and instructions.
It makes for a worthy target. The guidelines and suggestions above will help you in your efforts to achieve a proper handstand and enjoy all the benefits that come with it. As long as you approach the yoga handstand with respect, your progress, however paced, will bear fruit for you. Best of luck to you.
Sources
- Your Buddhi: 6 Surprising Reasons Why You Still Can’t Do a Handstand
- Yogi Approved: 6 Yoga Poses to Master Before Even Attempting Handstand
- Pullup & Dip: Top 8 Handstand Benefits – Why You Should Do Them Daily
- Wikipedia: Handstand
Sitasyoga.com is a participant in the Amazon Services LLC Associates Program, an affiliate advertising program designed to provide a means for sites to earn advertising fees by advertising and linking to Amazon.com. We also participate in other affiliate programs which compensate us for referring traffic.