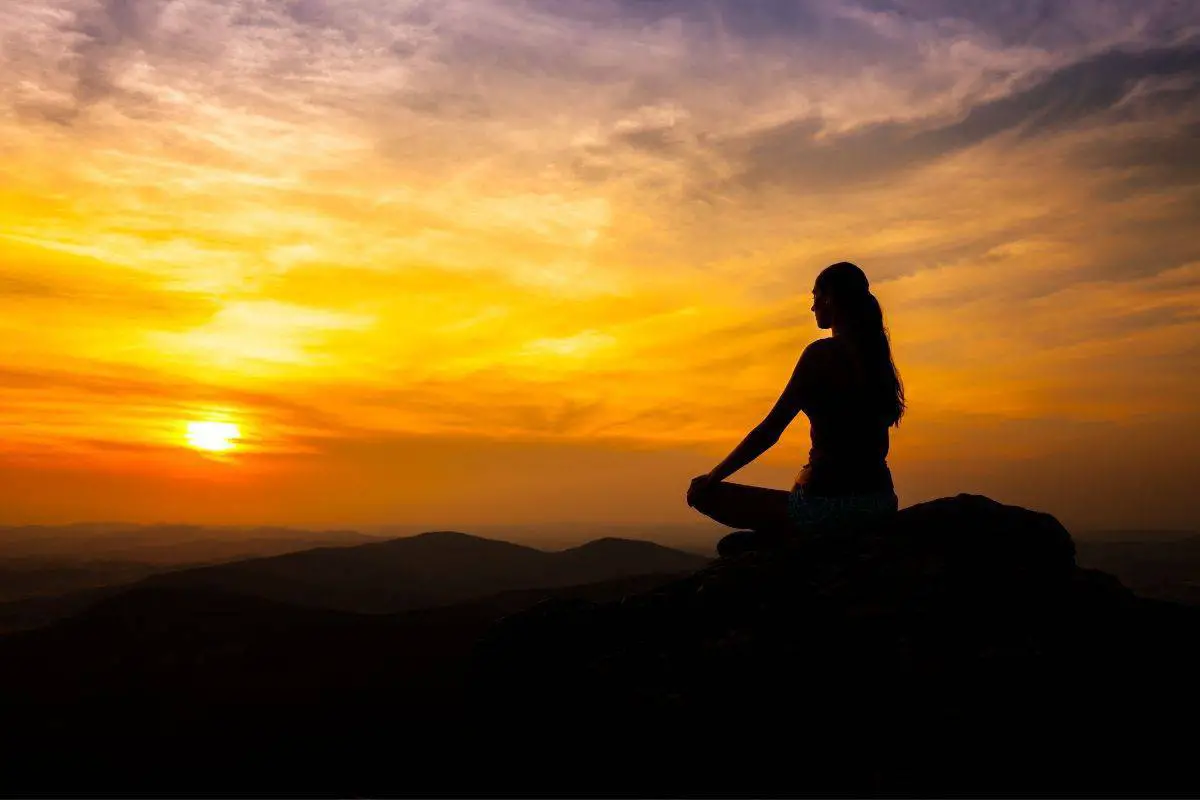
Yoga is a useful tool that can help your body and mind relax so you can achieve a better night’s sleep. To get the best results, use these 13 yoga poses that help you sleep better.
We’ve found 13 yoga poses that help you sleep better by removing tensions that build up in your body after a long, busy day. Each of these poses will help you stretch various parts of your body without elevating your heart rate. Your body will feel more relaxed, making it easier to get comfortable in bed.
In this article, we’re going to walk you through 13 yoga poses that will help you get a better night’s sleep. Each of these positions can be done with or without props. And most of them are easy enough to do for beginners or advanced users.
How Does Yoga Help You Sleep Better?
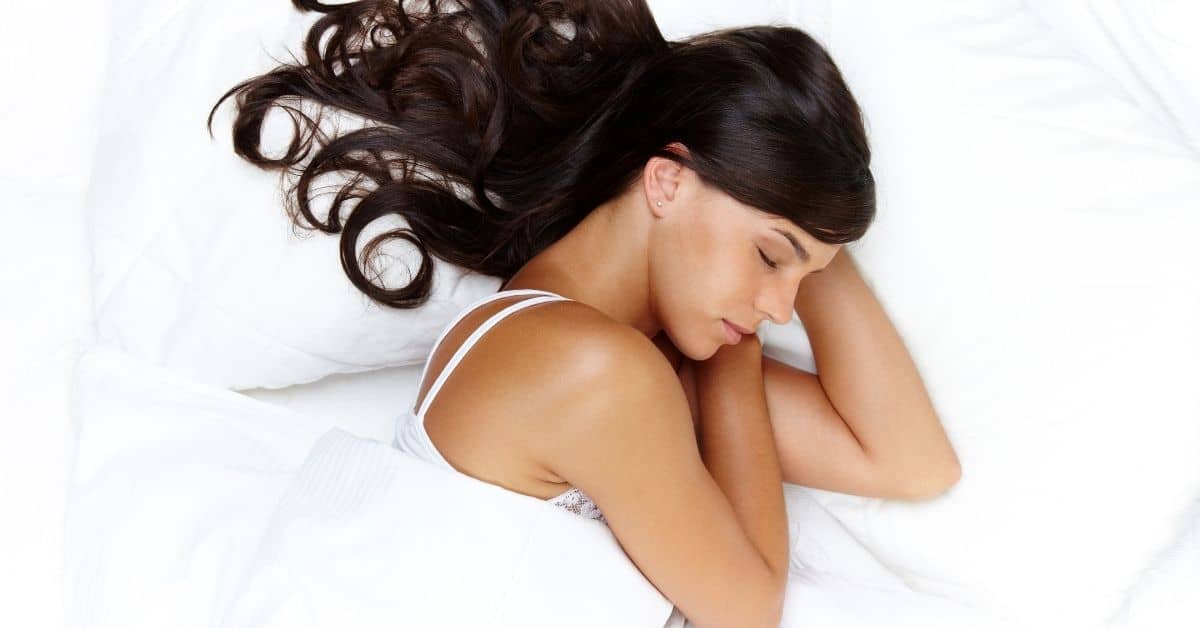
When you try to sleep after a busy day of staying on your feet, tension can build up in your body, causing pain and discomfort.
It’s hard to sleep when you have throbbing pain that causes you to toss and turn. Doing a few simple yoga stretches before you get into bed can ease the aches you feel. When your body relaxes, it’s easier to find a comfortable position to sleep.
Yoga can also help you reduce stress and learn to calm your mind. It’s hard to fall asleep when you have a million things running through your head. Being mindful of your headspace while twisting into various positions can help you dispel troublesome thoughts and calm down after a long day.
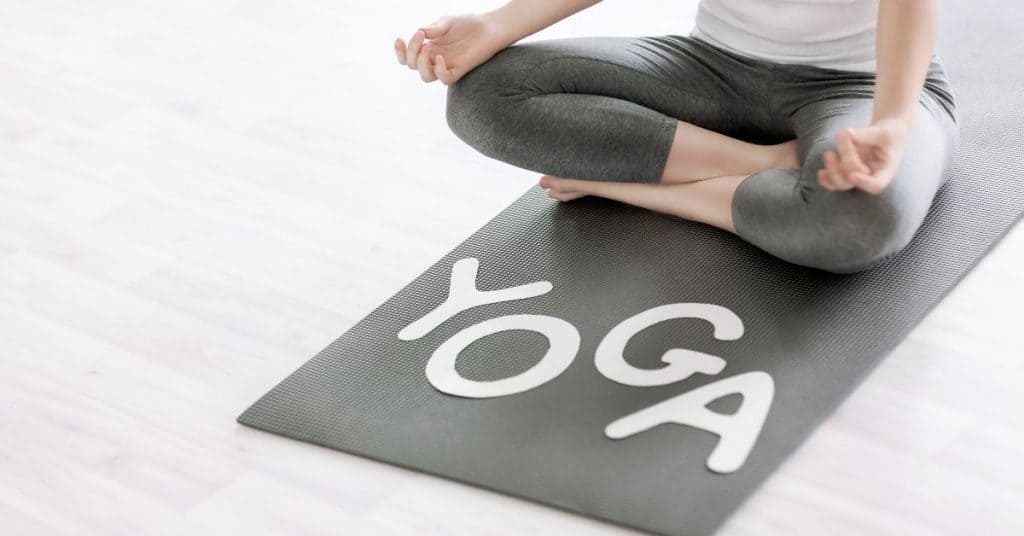
Here are 13 yoga positions that help you sleep better by relaxing your body and stretching various body parts. Pick a few or go through each of these positions as a nightly routine to help you have a better night’s rest.
Hero Pose
The Hero Pose, or Virasana, is an ideal yoga pose that helps you sleep better at night. This pose will stretch the knees and ankles so you can relieve tightness and discomfort before settling into bed.
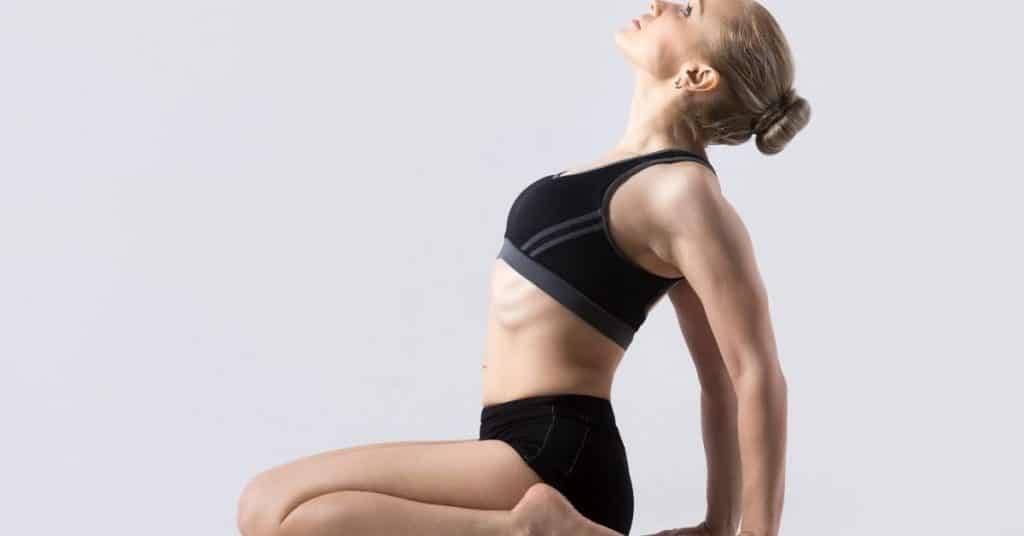
To do the hero pose, you will need to start by getting into a comfortable seating position, with your glutes on your heels and the tops of your feet resting on the floor.
Keep your spine straight and take deep breaths to open your chest. Focus on your breathing as you empty your mind and relax. Your heart rate should slow, and your body relaxes as you go through your breathing pattern.
Child’s Pose
The Balasana, or Child’s Pose, helps stretch your back and arms, so your body doesn’t have as much tension while you’re trying to sleep.
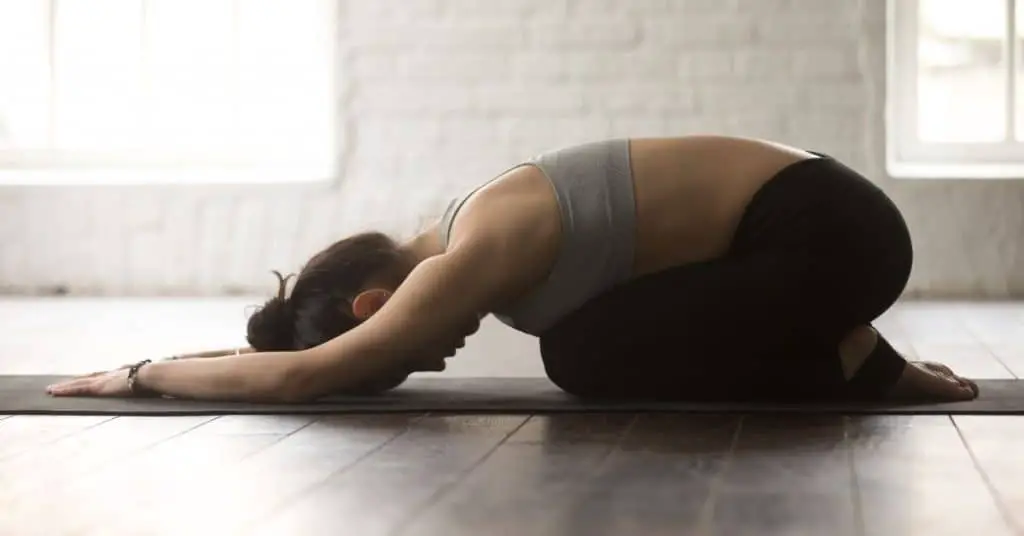
To get into this pose, start in the Tabletop position. Lower your hips to your feet while letting your chest rest between your thighs. Your knees should be spread out, allowing you to breathe deep. And your big toes should touch.
Rest your forehead on the ground and stretch your fingertips out in front of you, so you feel stretching in your arms. Some people find it more comfortable to position a blanket or towel underneath their heads for extra comfort.
While keeping your head pressed to the mat, you can turn side to side, giving your forehead a gentle face massage, which helps relieve tension and improves relaxation. Do this pose for one minute or 10 to 15 breaths.
Lizard Pose
The Utthan Pristhasana or Lizard Pose helps stretch the hamstrings, quadriceps, and hip flexors. You only need a few minutes to complete this position.
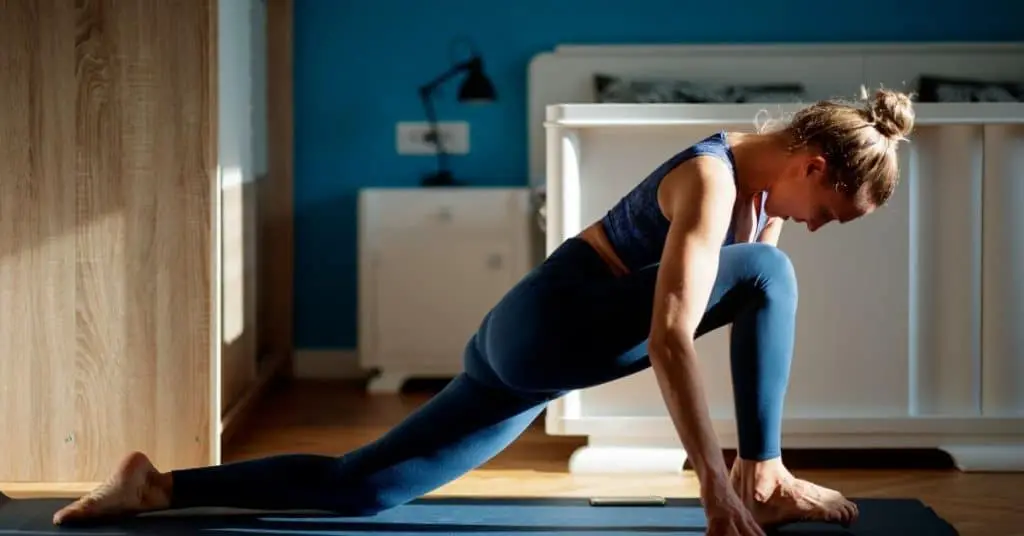
To do the Lizard Pose, start in a Downward Dog position, with your feet and palms flat on the floor, your legs straight, and a smooth transition from your spine to your neck.
Move your right foot forward so that it rests beside your right hand. You should be in a lunge position at this point. Your next step requires lowering the left knee towards the ground, pressing down in the hips. Your back and arms should stay straight.
Next, lower your body down onto your forearms. Your left leg should stay straight behind you, your foot and knee pressing to the ground. Your back should be flat with your head lined up with your spine.
Finally, press the ball of your left foot down on the mat while straightening your leg out for a deep stretch. Hold your position for 10 to 15 breaths, up to one minute, and then repeat the technique with the other side.
Some people choose to use a block for your elbows to rest on, making the position more comfortable. If you’re new to yoga or have flexibility issues, a block keeps you elevated and helps your hips open easier.
Locust Pose
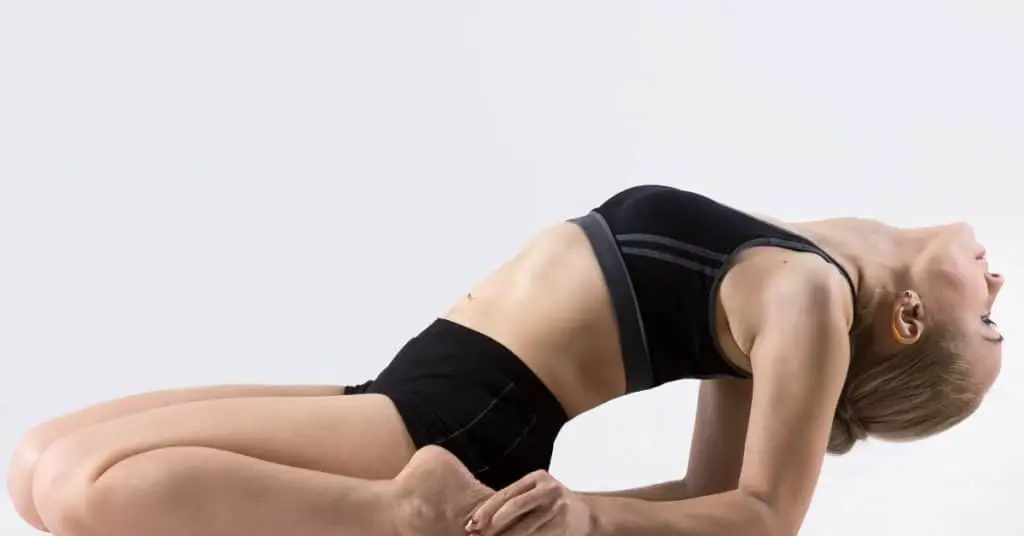
The Locust Pose or Salabhana works the glutes, leg muscles, and back. It also helps to provide an excellent stretch to the front of your body while relaxing the shoulders.
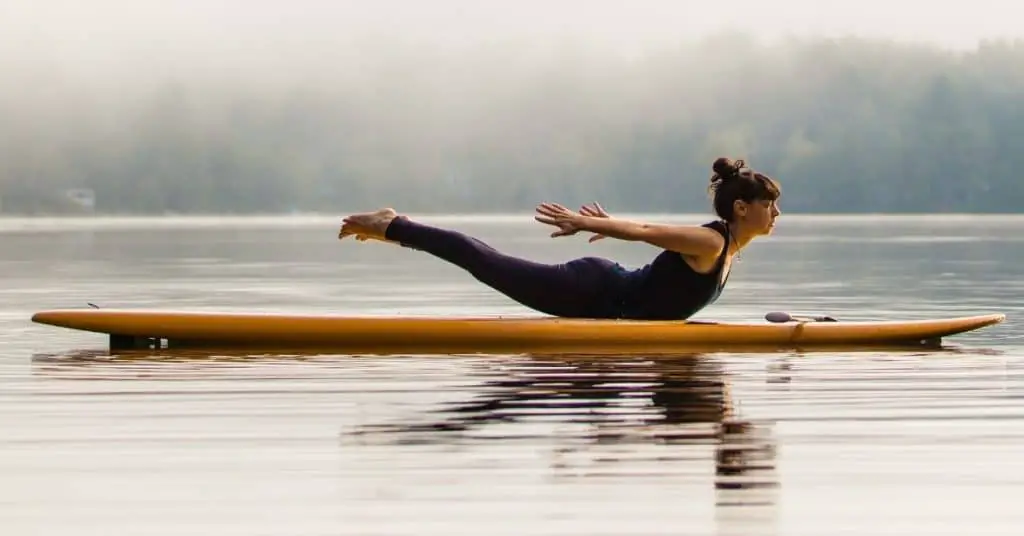
To do the Locust Pose, you start by laying on your stomach, arms resting at your sides, with your forehead or chin pressed to the mat. Press your hips towards the floor while pulling your navel towards your spine while exhaling.
As you inhale, raise your head, arms, legs, and chest from the floor. Move your hands towards your back, imagining someone pulling them up behind you. Only your chest, stomach, and hips should remain on the floor. Your feet can be touching or hip-width apart.
Hold your position for five slow, even breaths. While exhaling, lower your body into your starting position. Rest for a few breaths and then repeat the pose two to three more times.
If this position is too hard, you can keep your legs down on the mat and lift your upper body until you feel comfortable enough to try lifting your legs. You can also lift just one leg at a time, instead of both. Hold each leg up for 30 seconds.
Cat and Cow Poses
The Marjaryasana (Cat Pose) and the Bitilasana (Cow Pose) can be excellent positions to help bring your body back into alignment and remove aching joints.
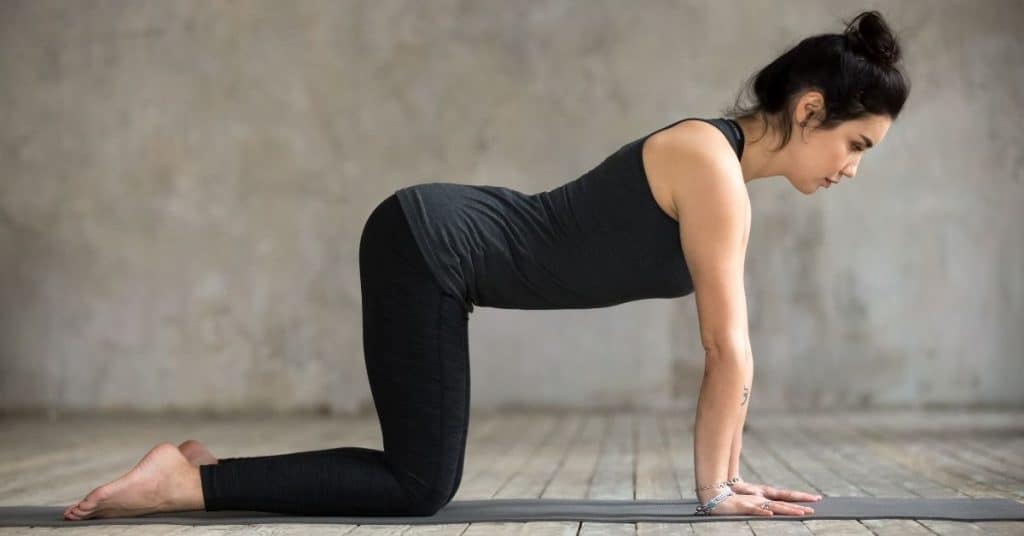
You can switch to the Cat and Cow poses right out of your Hero pose, or you could get into the Tabletop position and go from there.
Start your cat pose by resting with your palms and lower legs flat on the mat, your feet facing down. Exhale a breath as you tilt your tailbone and the crown of your head towards the ground. Arch your back into a C-curve with your shoulder blades pulled apart to allow for deep breathing.
As you inhale, move the crown of your head and tailbone back upwards, towards the ceiling. At this point, your lower back should hollow out.
Continue to rotate between Cat and Cow as you work out the kinks in your back. Each breath should feel like your vertebrae are spacing out, which relaxes the spine. When done, return to a neutral tabletop position.
Viparita Karani
The Viparita Karani, or Legs on the Wall, pose is a simple move that most people will be able to do for a slow relaxing stretch for your hamstrings.

This position can also reduce lactic acid and lymph from your legs. This reduces fatigue and leg soreness. If you spend a lot of time walking every day, you should try this yoga move before bed.
To perform Viparita Karani, you will lay on your back with your feet stretched up on the wall. Many people move into this pose from a Figure Four stretch.
For a more intense stretch, you can move your tailbone closer to the wall, so your legs get a better stretch. You can position so that your glutes are pressed against the wall, requiring your legs to stay straight, providing ideal stretching for the glutes, hamstrings, and knees.
Figure Four
Figure Four, or Sucirandhrasana, is a great move to stretch the hips, which is crucial for a good night’s sleep after a long, active day.
We’re covering the modified version of Figure Four, which is better for relaxing at night. But you can use the regular Figure Four position if you’re a true yoga fanatic. Both work well to give you relaxing stretching.
For Figure Four, you need to lay on your back with your tailbone lined up with a tall, flat surface such as your wall. Position your glutes a foot away from your base.
Start by placing the bottom of one foot against the wall. Keeping your tailbone flat on the ground, shift the foot not on the wall up, so it lays against the leg’s thigh propped on the wall. Your foot should stay flexed with your toes pointed towards your shins. This step prevents strain on your knee joints.
If you want more intense stretching, you can push your tailbone against the wall while pressing your top knee open with your fingers. Figure Four is a lower-impact option, but if you want more tension release, you can do the Pigeon or Lotus, which are harder to do.
Supine Spinal Twist
Using the Supine Spinal Twist, or Supta Jathara Parivartānāsana, helps work out the kinks in your legs, back, and neck. There are a few different variations you can do with this pose to target various areas.
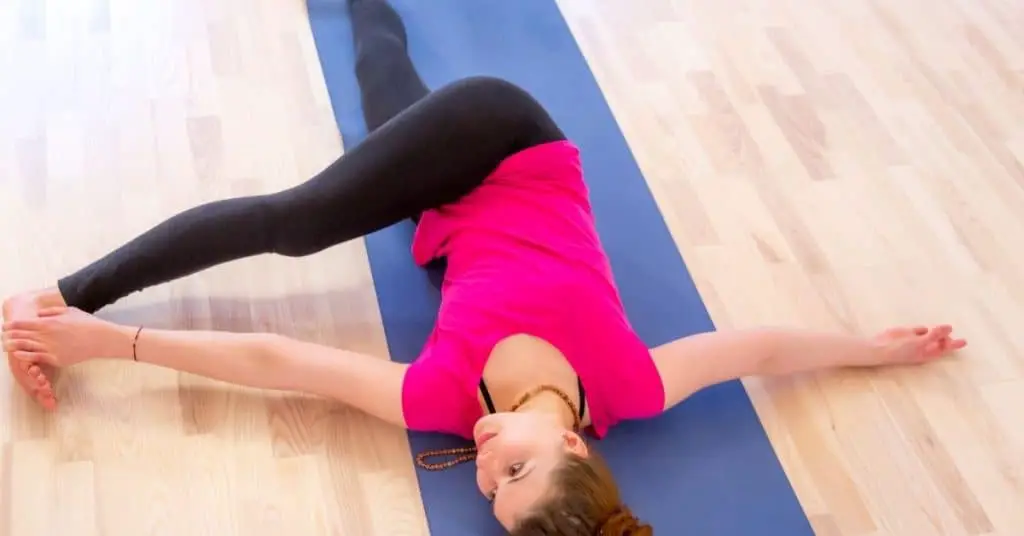
To do this pose, lay on your back while bringing your knees into your chest. Rock back and forth a few times until you’re ready to stretch. When you’re ready to proceed, stretch your arms out at your sides, into a “T” with your arms aligned with your shoulders. Your knees should fall to one side.
Your leg position is how you will change the pose variations. Options for this pose include having both of your legs straightened out, both legs bent, or the bottom leg bent while the top leg stays straight.
To feel more of a twist in your body, make adjustments with your tailbone so that your back is in a straight line while moving your glutes towards the middle of the mat. This position provides a deeper stretch for your lower back.
For stretching your neck, keep your gaze on the opposite side of your knees. Repeat this pose on both sides, so you get a full workout.
Reclining Goddess Pose
The Reclining Goddess Pose stretches the inner thighs, lower abdomen, and pelvis. While laying on your back, let your legs fall to the sides, with your feet pressed together to create a diamond shape. Position your heels as far towards your pelvis as you can comfortably get.
Move your shoulder blades so that there’s a gap between the tops of your shoulders and your earlobes. Your left hand should rest over your heart while moving your right hand to lay across your belly.
Focus on your breathing as you inhale deeply, so the air expands your lungs. Keep your breathing deep and even while relaxing. Some people like to close their eyes while resting in this position to stretch.
Happy Baby
The Ananda Balasana or Happy Baby pose targets abdominal discomfort and helps massage your spine. It’s a simple position that doesn’t require a bunch of flexibility.
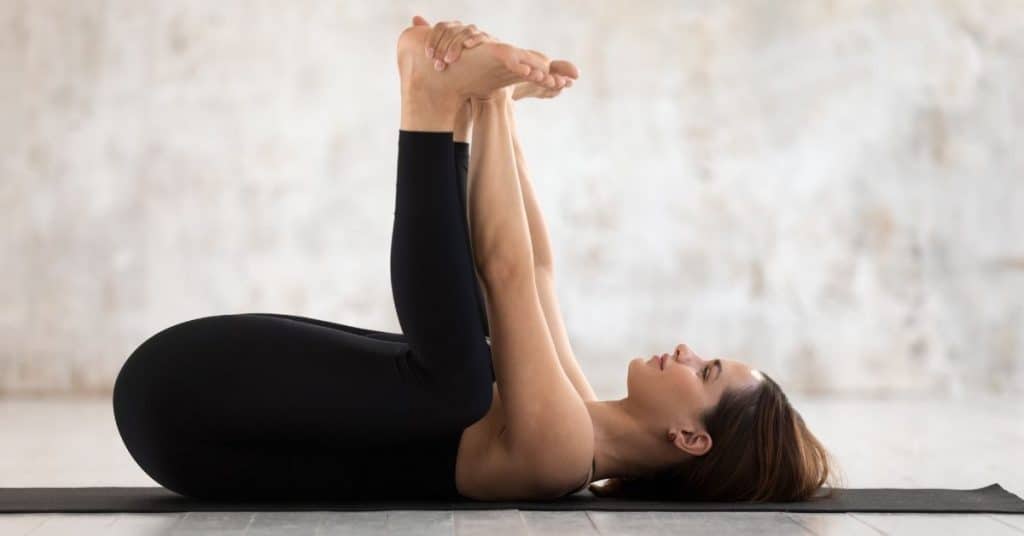
This position starts by lying on your back. Many people transition from the Supine Spinal Twist or Figure Four to the Happy Baby pose and then move into the Reclining Goddess Pose.
To do this position, pull your knees into your chest and grab your big toes with your index and middle finger. While keeping your tailbone flat on the ground, pull your heels towards the ceiling.
You should feel your knees pushing into your armpits. Rocking from side to side will give your spine a gentle massage while easing abdominal pain.
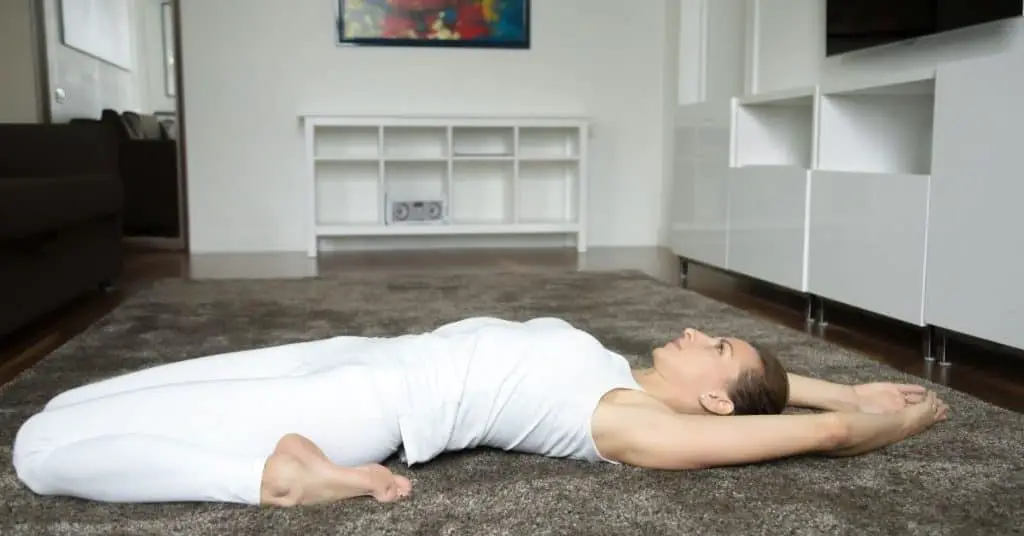
Corpse Pose
The Corpse Pose also referred to as the Final Relaxation Pose, or Savasana, is the easiest pose to do that doesn’t require any exertion. This is often the final pose to use after completing your yoga stretches.

Work your way into this position by laying on your back and letting your body relax. Many people go into this pose from the Reclining Goddess position.
This pose will help you relax and become tranquil so you can fall asleep faster. Your feet should be settled at the corners of your mat with your toes relaxed to the sides.
Your hands should be palm up, with the backs of your hands resting flat on the mat inches from your hips. Close your eyes and empty your mind of thoughts. You should feel your body getting heavy while you breathe naturally.
Standing Forward Bend
The Standing Forward Bend, or Uttanasana, is a quick yoga pose that works your back, legs, hips, and shoulder muscles so you’ll feel more relaxed.
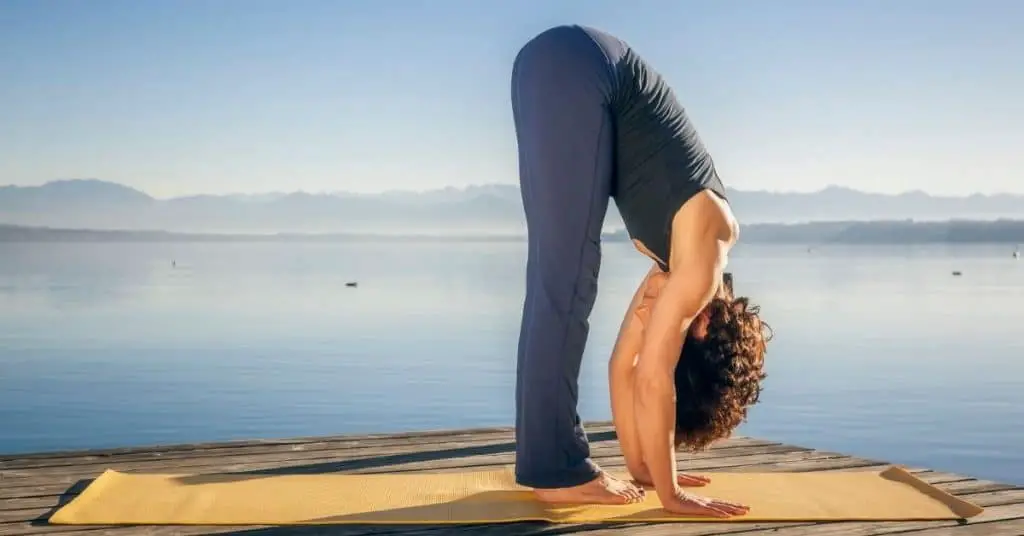
This is an easy pose to attempt, regardless of your flexibility level. You start in the tadasana position, with your feet held together or spread four to six inches apart. Keep your weight on your arches with the back of your head lined up with the back of your pelvis.
Lift your hands towards your hips or bring them overhead with a deep inhale. Spread your feet apart, and on an exhale, hinge your body forward. Your spine should stay straight and don’t lead with your chin.
Touch your fingertips to the ground, or use blocks if you can’t bend to the floor, pressing down on your hands while working your core muscles. Your weight should stay distributed on your arches.
When stretching your legs in this position, you should feel stretching in your hamstrings. But if you notice the stretching moving into your sitting bones, it means your legs are too straight.
For people who can’t do a full bend, you can modify this position to a half-forward bend (also called flat back or Ardha Uttanasana). This position allows you to touch your fingers to the floor (or a prop) while keeping your spine extended and your knees bent.
Head-of-the-Knee Pose
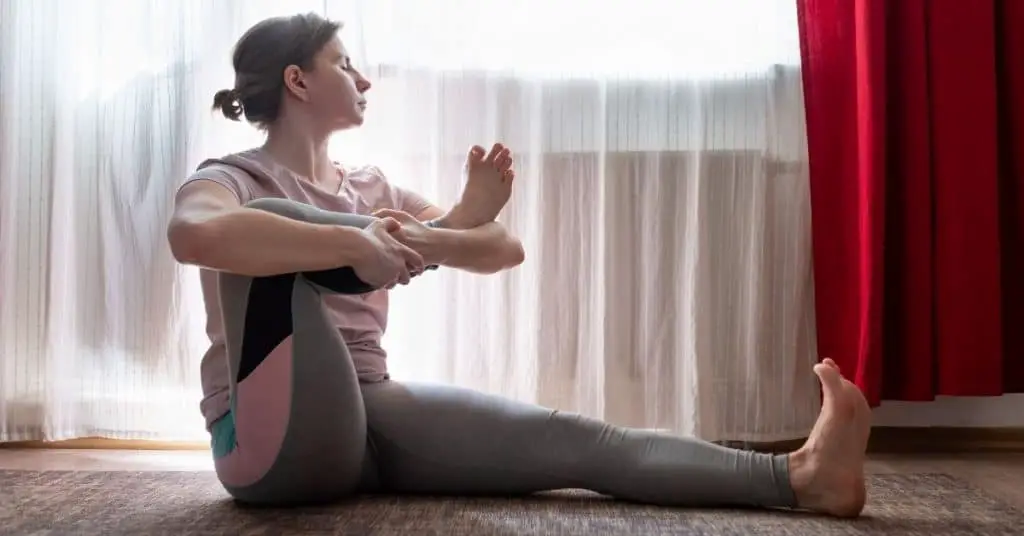
The Head-of-the-Knee pose–Janu Sirsasana–is a forward bend pose that can help you reduce anxiety, fatigue, and headaches. It can also aid in better digestion, lower your blood pressure, and help stretch your back.
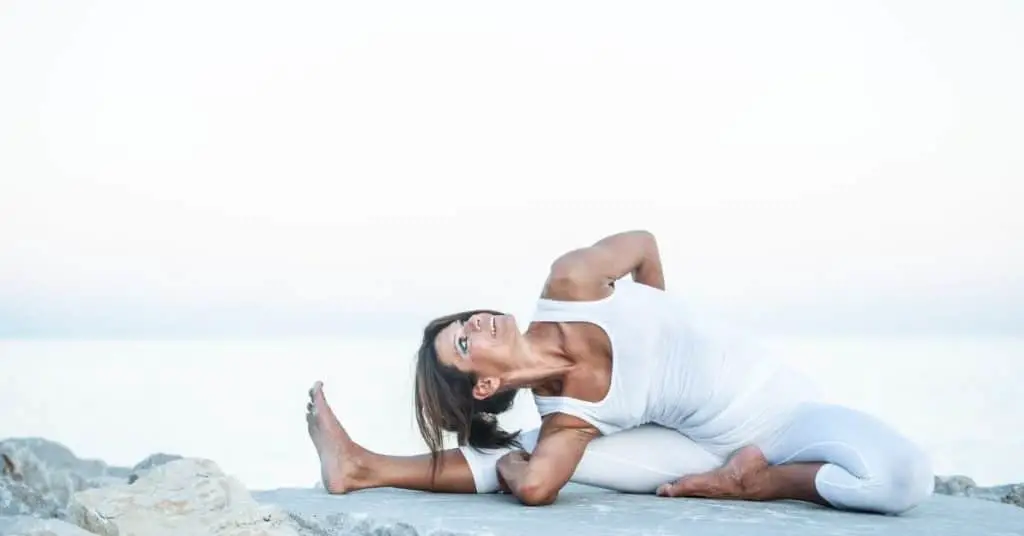
To do this position, start by sitting with your legs stretched out in front of you. Bending one knee, use the hand on the same side to pull your foot towards your groin. Extend your knee to the side, stretching out through the thigh and knee.
Some people put a block under their thigh for extra comfort. While your leg is extended, turn towards your other leg, placing your opposite hand outside your leg. Twist your trunk towards your extended leg while breathing deep.
Reach for your foot or shin if you can’t reach, so you get an excellent stretch to your hamstring. You can rest your head on a yoga block during this point. After holding your pose for one minute, or ten to fifteen breaths, relax and switch sides.
In Closing
Getting into a routine of practicing a few simple yoga poses each night before bed can help your body relax and make it easier to fall asleep. The best yoga poses to use before bed are ones that will help you stretch your muscles and joints without elevating your heart rate. For the best results, use yoga and meditation together to relax for a good night’s rest.
Sources
- Classpass: What is Lizard Pose?
- Do You Yoga: 6 Benefits of Legs Up the Wall Pose
- Dummies: How to Do the Child’s Pose in Yoga
- Ekhart Yoga: Locust Pose – Salabhasana
- Pocket Yoga: Figure Four
- Very Well Fit: How to Do Reclined Goddess Pose (Supta Baddha Konasana) in Yoga
- Yoga Basics: Happy Baby Pose
- Yoga International: Standing Forward Bend
- Yoga Journal: Hero Pose
- Yoga Outlet: How to Do Corpse Pose in Yoga
- Your Pace Yoga: Posture of the Month: Supine Twist
Sitasyoga.com is a participant in the Amazon Services LLC Associates Program, an affiliate advertising program designed to provide a means for sites to earn advertising fees by advertising and linking to Amazon.com. We also participate in other affiliate programs which compensate us for referring traffic.