Yoga offers a raft of benefits to the human mind, body, and spirit, which explains why it is such a popular health and wellness practice in today’s world. However, for active individuals of all ages, the physical aspects are what draw them primarily to yoga. Among the most useful of these physical benefits for everyday living are balance and stability, but what yoga poses are the most effective at strengthening these?
Examples of yoga poses to improve balance and stability include the Mountain Pose, Tree Pose, Triangle Pose, Chair Pose, and more. These can be accomplished by activating and strengthening the muscles involved in controlling these functions.
In this post, we’ll be taking a look at some of the most effective poses you can practice if you’re looking to improve upon these two points: balance and stability. With a detailed description of how to position each part of your body as you execute the poses for the best results, you can be sure that you will find enough poses here to set you firmly on the path to attaining your objectives.
What Our Bodies Need for Balance and Stability
Before diving in, it would be useful to first take a look at what exactly we mean when we speak of stability and balance. Our bodies are complex structures comprising various muscles and muscle groups, each of which are responsible for various functions such as mobility, posture, digestion, circulation, balance, and stability.
Many people erroneously assume balance and stability to be the same thing. It is an understandable mistake to make, more so because the distinction between them is a small yet very significant one.
The short answer to this confusion is that balance refers to our ability to control our own bodies against the forces of gravity while keeping ourselves still. On the other hand, stability refers to our ability to keep our bodies under control even while in motion. It’s a small-big difference, to coin a term.
There is considerable overlap in the yoga poses suited to improving these two abilities because the muscles and muscle groups in question will often be activated in both instances.
Poses aiming for balance will be more focused on activating the toes, legs, and pelvic region muscles. Stability-focused poses will see a high targeting of the body’s core muscles, which embody the abdominal region, sine, pelvic region, and legs.
We’re going to take a closer look at a broad sampling of all the potential poses you can try out, although we’ll point out which ones are more geared towards building up your balance and which ones will give you a bigger stability boost.
Let’s get on with it then.
Tadasana: Mountain Pose
Even though this is considered the most basic of standing poses, it still serves to help develop good balance and stability. Essentially, what you’ll be doing here is standing up, the difference being that you’ll be standing up in the best way for your body and training it to make a habit out of it.
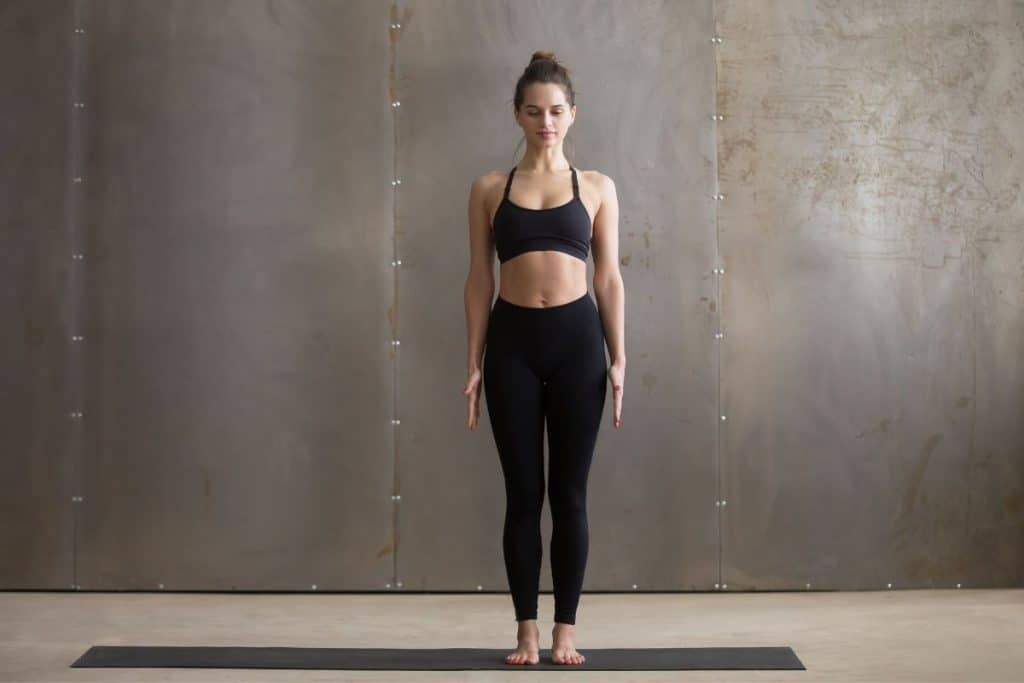
Finding one’s proper form might seem like a natural thing to do. However, with so many of us spending countless hours hunched over our computer screens, it’s more relevant to good balance than ever for us to get familiar with the optimal alignments our bodies require to keep us firmly on our feet.
Here is what you will need to do:
- Stand up straight with your feet shoulder-width apart.
- Move your shoulders in a rolling motion downward and backward, all the while keeping your arms down by your sides. The alms of your hands should be up against your chest in the praying position or aligned down with your sides, with the palms facing outwards.
- For deeper immersion, keep your eyes closed. This will add to the work being done by your muscles and senses to keep you still.
- Keep still in this position for the duration of at least five breaths or as long as you can while still comfortable.
This pose serves to work and train the muscles of your back and your core abdominal muscles.
Uttanasana: Forward Fold
This is a pose that’s great for the point in your session where you feel the need to take a breather, although it might be a bit of a challenge for those with significant flexibility constraints. Do not be tempted to force your body into it, but rather go into it as far as you are comfortable. As we always say, it’s about progress with yoga.
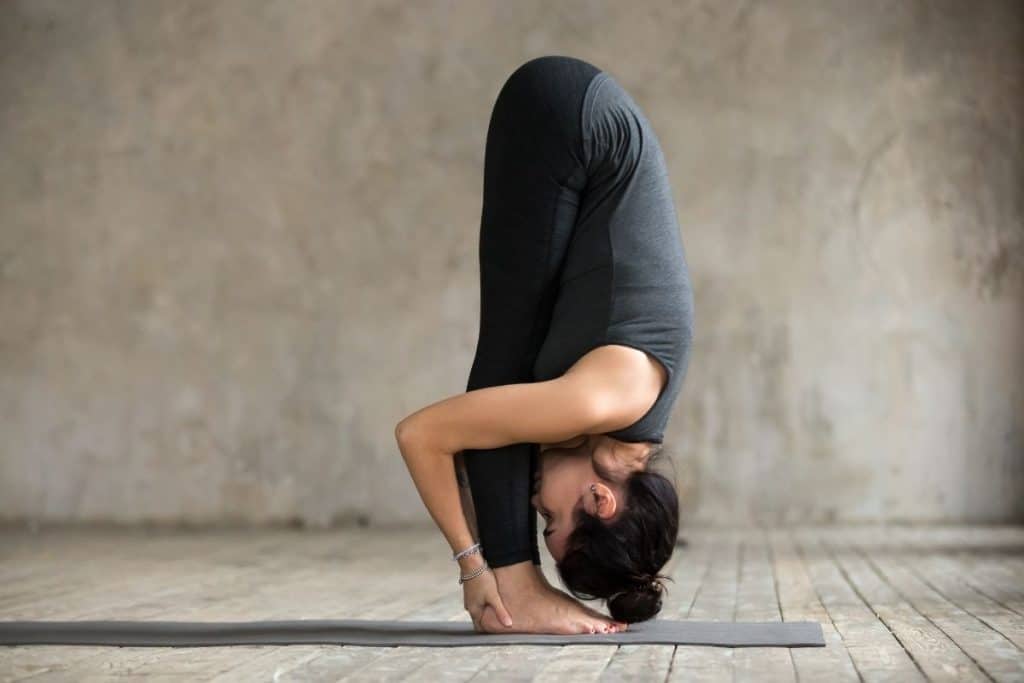
Try and maintain good form as far as possible for best results, meaning that you shouldn’t give in to the temptation to bend your knees too much.
Here is what you will need to do:
- Straighten your hands by your sides and your body straight up. Use your waist to jackknife or fold forwards, so your torso moves as close to your knees as possible. More flexible practitioners will want to see their heads almost touch their ankles.
- You will not be completely rigid doing this. Your knees should bend just a bit, and your lower back should soften somewhat. The extent of these accommodations will depend on your dimensions.
- In order to make the pose just a bit more comfortable, you could try swaying your body gently from side to side or reach with the palms of your hands for the elbows of your opposing hands, almost as though folding your arms behind your knees.
- Keep your body in this pose for between five and ten breaths for best results.
This pose is geared towards activating your lower back muscles and your hamstrings.
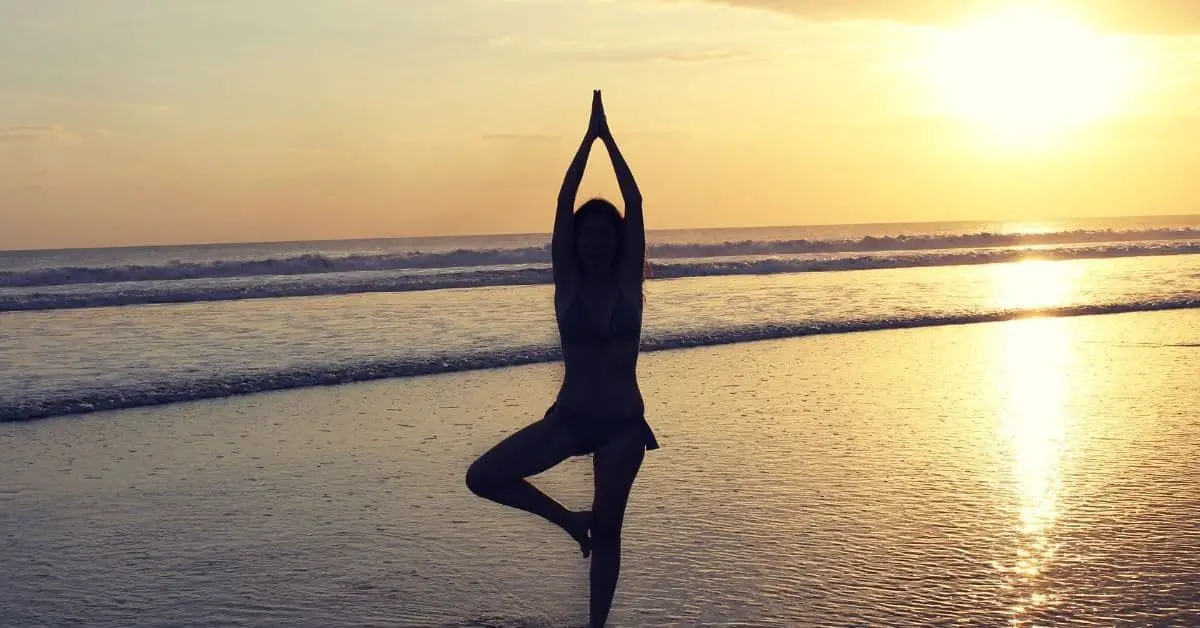
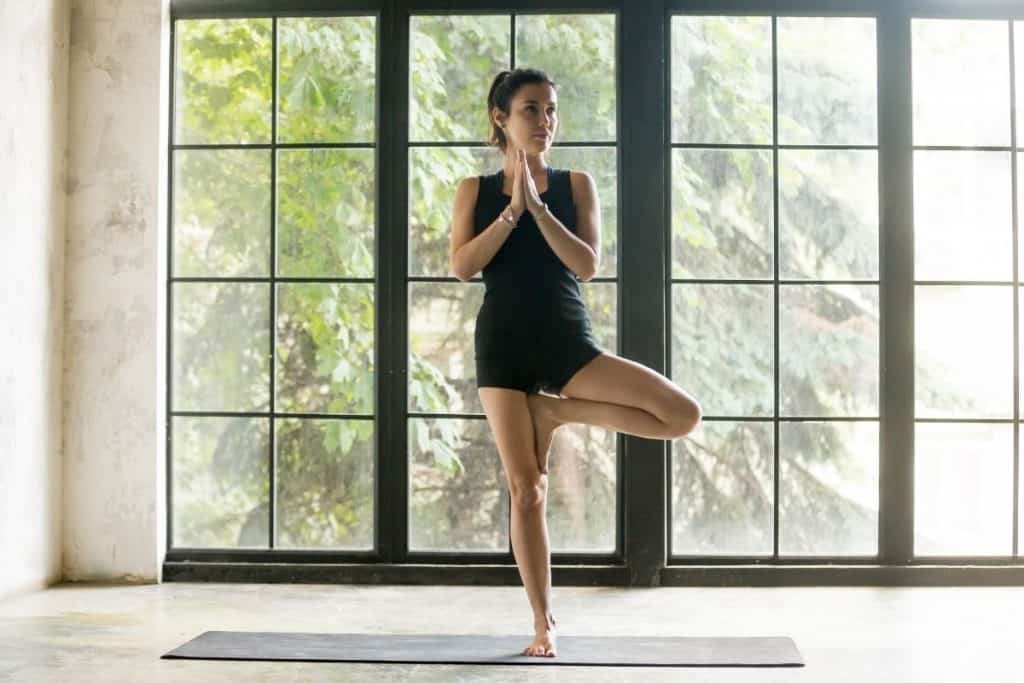
Vrksasana: Tree Pose
The tree pose might be moderately challenging for those with poor balance to begin with. But remember that you don’t have to get any pose exactly right on your first try. Do what you can manage and work your way from there.
Here is what you will need to do:
- Starting from a neutral standing position, lift the toes of both feet, spread them out like a fan, and place them back down to limber them up.
- To ground yourself properly, proceed to ground yourself all along with the three points of your foot. This is done by feeling for the ground through your heel, the base of your little toe, and the base of your big toe. Equal sounding at these three points gives you a solid foundation to work on.
- Go on to shift your weight onto your stronger foot while beginning to raise your off foot away from the ground, being sure to keep a slight bend in your strong legs knee as you do so.
- Here, you can make accommodations for your flexibility or balance levels by deciding how high you are comfortable raising your off foot.
- Start by raising it only to the level of your stronger leg’s shin or inner calf region. If comfortable, try raising it further to the inside of your inner thigh region, being careful not to rest it on your knee.
- As you go through these motions, be sure to keep your hips pointed forwards and to avoid bending at the hip.
- Your hands can be in a prayer position in front of your chest. It can be raised over your head or laced akimbo on your hips.
- Both shoulders should be in a relaxed position away from your ears, rather than hunched up and tense.
- Keep your body in this pose for between 3 to 10 breaths before repeating the process using your stronger leg, now being the one raised.
This pose engages your core and leg muscles.
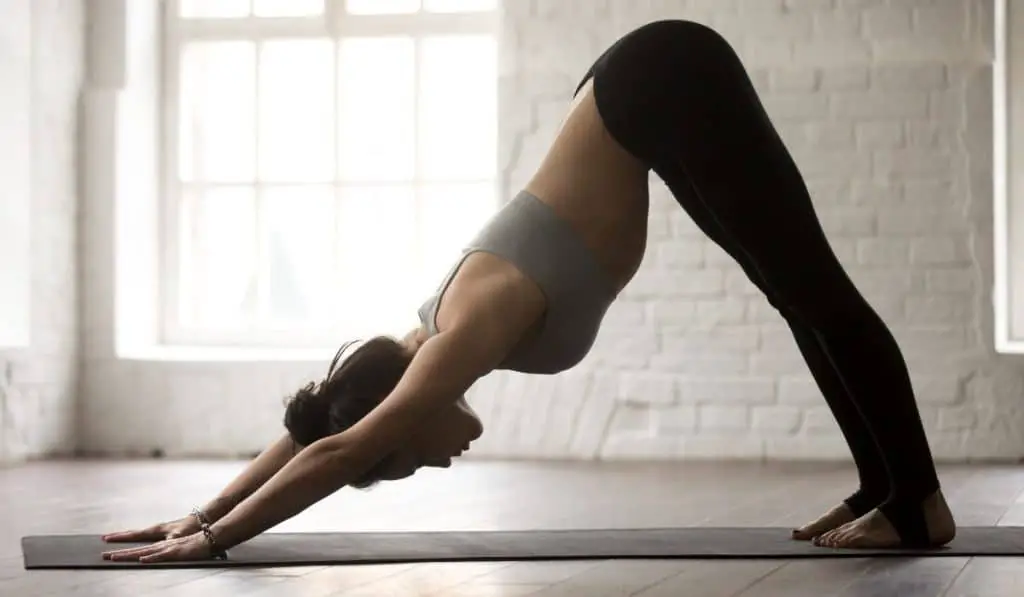
Adho Mukha Svanasana: Downward-Facing Dog
Even those with the barest familiarity with yoga will have heard of the downward-facing dog, or at least seen it resented in various media. It is the quintessential yoga pose, present in most, if not all, yoga class routines out there.
Don’t let its popularity mislead you into the assumption that it isn’t an effective yoga technique, however. There is a good reason behind it. This is a highly effective pose for those looking to give their entire body a good stretch, and it will give you a great workout of the muscles responsible for holding you upright and on your feet throughout the roughest of days.
Here is what you will need to do:
- You’ll be starting from a standard plank pose, where your arms and feet are holding your body off the ground as though you are about to start doing pushups.
- From this positioning, maintain the position of your feet as you bend at the waist to raise your hips into the air.
- The angle of your arms to your torso should be the only additional change in posture aside from your waist angle.
- Go as high up as you feel capable of doing, all the while ensuring that your palms remain spread out on the mat in the same position.
- Your back should maintain its straightened posture and spread out your shoulder blades rather than hunch them.
- With your body in this inverted V shape, hold your position for 5 breaths before releasing it.
This pose serves to activate your core muscles, including the chest, abdomen, and lower back muscles surrounding the spinal column, which are important for good posture. Many use it to prepare for more demanding balance postures involving the arms as it also works on your wrists, shoulders, and arms.
Virabhadrasana II: Warrior II or Toppling Tree
This is another pose that can stretch the limits of those who struggle with their balance, but it is doable with a bit of patient practice. It is a great step up for those feeling more confident with their standing poses, especially since it involves a more dynamic shifting of body weight onto the single supporting foot.
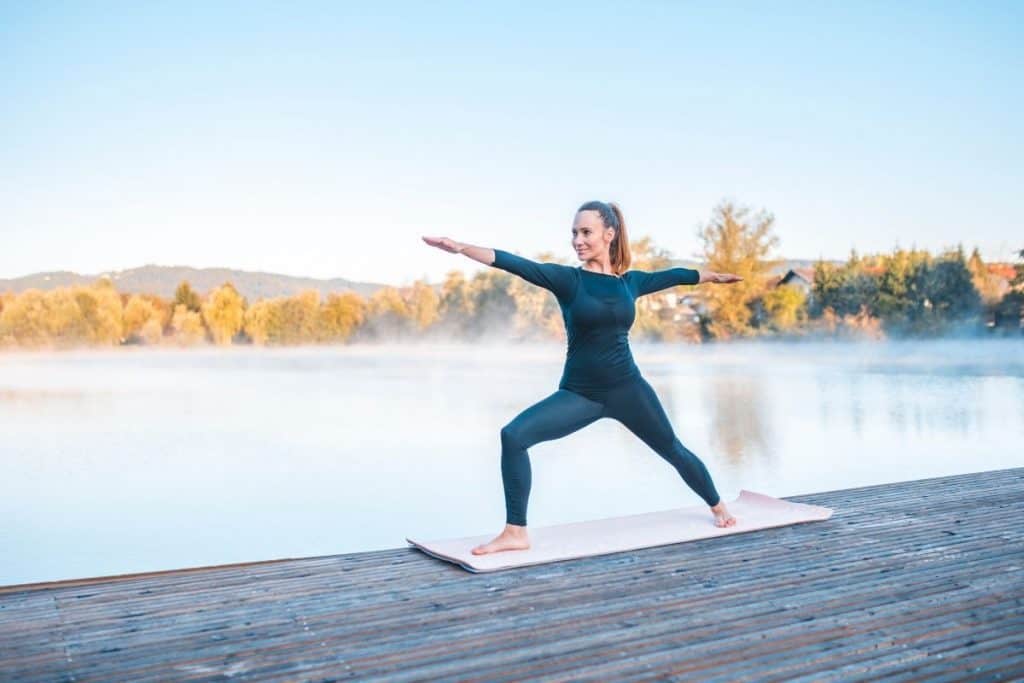
At any rate, it is a great way to train your body for increased balance and stability. However, go at your own pace.
Here is what you will need to do:
- Start from a neutral standing position with your feet at shoulder-width apart.
- Just as you would do when trying for the tree pose, ensure your feet are grounded well at their three points of contact.
- Gently begin to shift your body mass onto your stronger foot but do not raise your off foot entirely off the ground just yet. Have your toes maintain contact with the ground even as your leg is rising upwards.
- Up to this point, your stronger leg should maintain a slight bend at the knee.
- Should you feel that your balance is holding well at this stage, you can try to go the rest of the way.
- Go on to gradually raise your off leg into the air behind you, being sure to make this motion as slow and gentle as you need it to be. Ensure that you keep this leg straightened as you raise it.
- As you raise your leg, simultaneously lower your chest or torso towards the ground in front of you. You may flex or point out your toes as they taste the breeze behind you – whatever feels best.
- Note that you are his should be at an even level with the ground. This may mean that you need to drop your weaker hip lower just a bit, but the rest of your body will be more or less along the same alignment.
- Hold your hands out in front of you, stretched out behind you, or your hips as you hold this pose.
- Maintain this posture for at least 3 to 1 breaths before switching to your other foot for the best results.
You should feel your core very actively being engaged as you hold this pose, although your legs will also be activated here.
Utkatasana: Chair Pose or Awkward Pose
Chair pose is popularly known as the awkward pose because it’s just that awkward. The upshot is that this awkwardness is essential to its effectiveness, which is helping you build up the muscles you need to maintain good balance and stability.
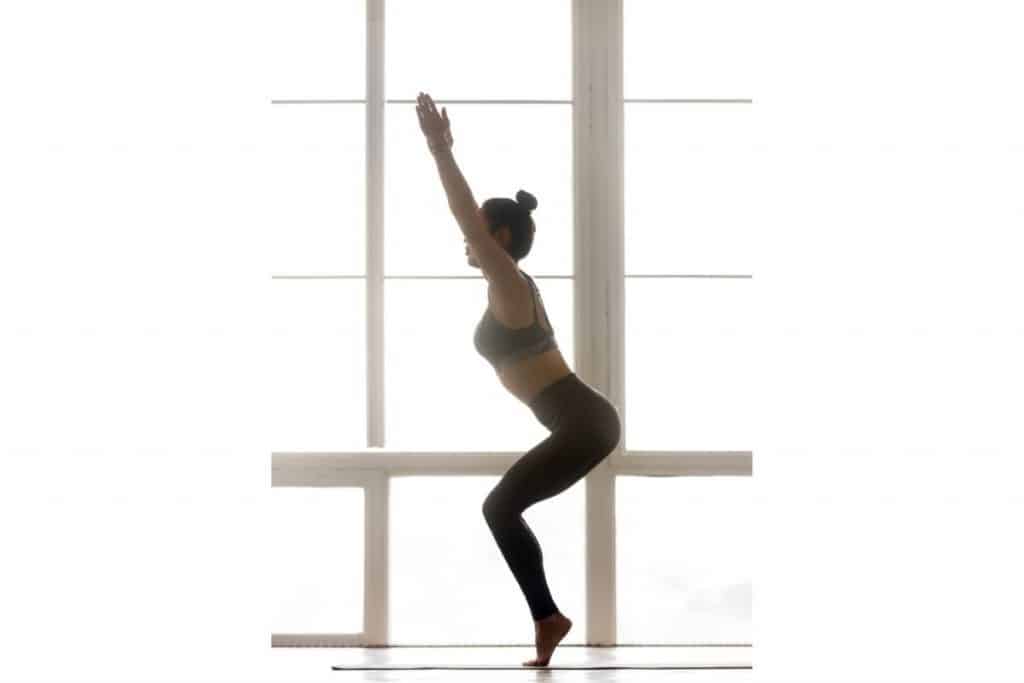
Here is what you will need to do:
- Starting from a neutral standing position, shift the weight of your body back onto the back of your heels.
- Proceed to move your bottom back behind you so that it sticks out, even to the point where you think you’ve gone further than you think you should. Do this gradually, so you don’t topple inadvertently.
- Be conscious of keeping your knees located further back than the tips of your toes. Picture a toddler squatting. It is interesting that they actually achieve perfect form in their squats, so much so that weight lifters regard the toddler form to be their standard squat form.
- Anyway, your arms should be raised over your head or kept down by your sides as per your own preference.
- Your chest region should be ket lifted with your shoulders down and away from your ears. Remember that your arm positioning might vary from person to person as they will counterbalance your weight profile. Don’t worry about the next guy’s pose.
- Maintain the pose for at least 3 to 10 breaths for best results.
- Should you be especially worried about your ability to achieve and hold this pose, there are a couple of things you could do. You can reduce the angle of flexion in your knees, meaning that you make your squat shallower, or you could have some type of support behind you, be it a yoga partner, chair, or whatever else will work to support you should you topple over.
You should feel your legs and core being engaged in this position.
Side Lunge
This is a pose designed to give both sides of your body a thorough stretching while simultaneously giving your hamstrings and thighs a good strengthening workout. These are all muscles and muscle groups with a role to lay in our balance and stability, which makes the side lunge a useful tool in our arsenal.
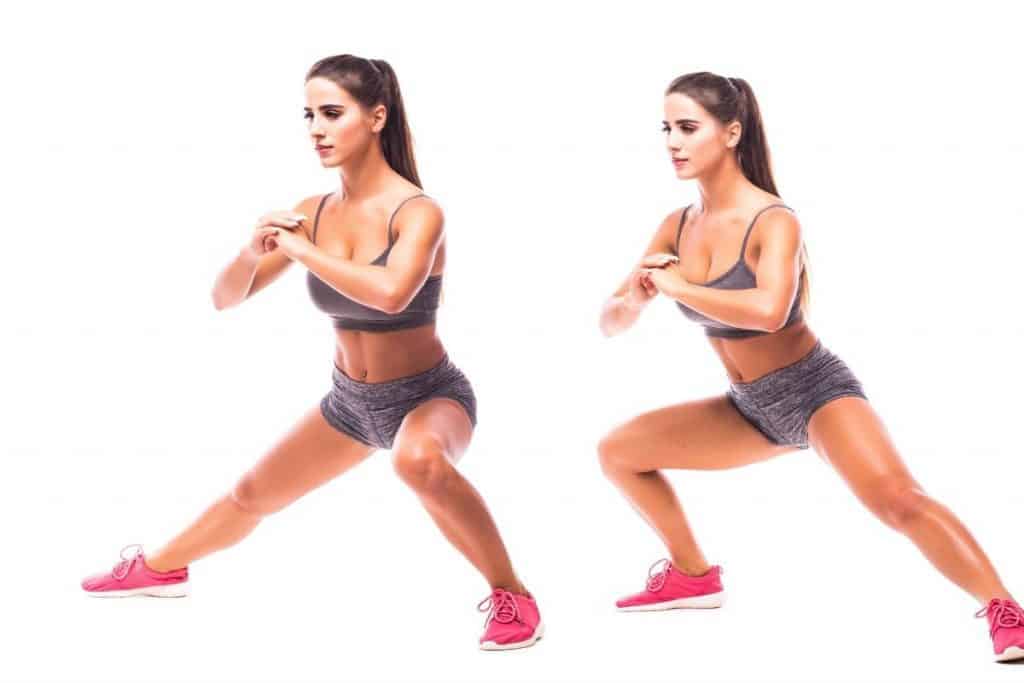
Here is what you will need to do:
- Starting out from the basic lunge position, ensure that your front knee is at a 90-degree angle to your hips, with your hips being wide open facing the side.
- Your rear leg should be stretched out straight with its foot pressing firmly to the ground.
- Rotate your torso so that it faces to the side and bring one hand up to your thigh or place it on the floor, according to your own preferences.
- Your other arm should now be extended up and over your head with the palm facing downwards to execute the pose fully.
Note: that your focus should be on exerting stretching pressure on your core and abdominals, meaning that you should not allow too much weight to be carried by your supporting hand on the ground.
Setu Bandha Sarvangasana: Bridge Pose
As simple as the bridge pose looks, it happens to be among the more powerful core workouts accessible to most yoga practitioners, beginners, yogis, young or old.
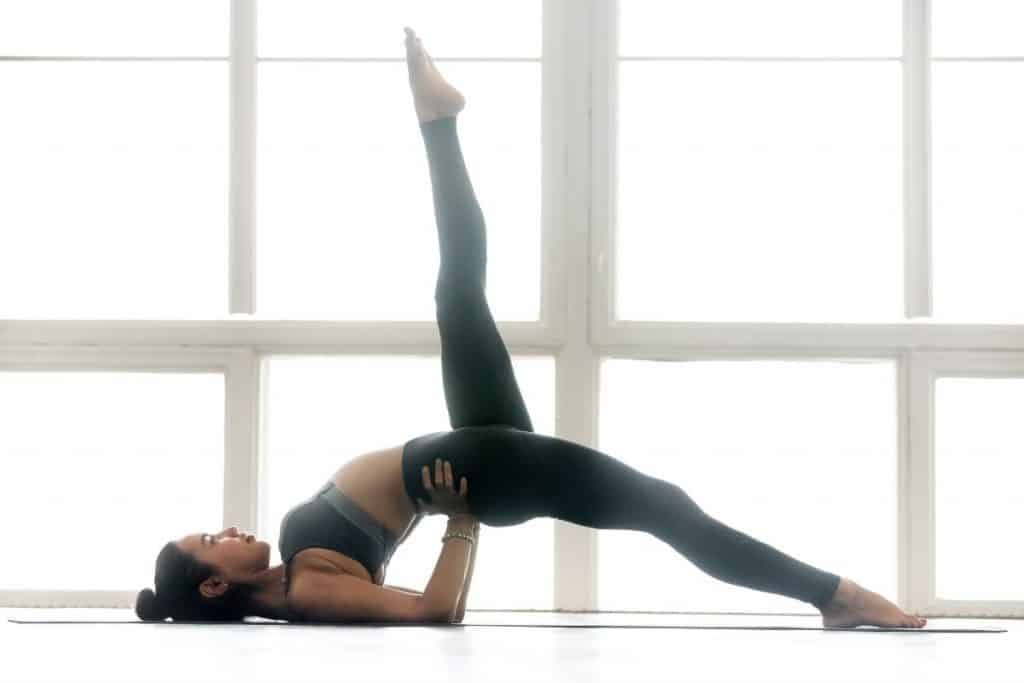
Here is what you will need to do:
- Lay down flat on your back, looking up to the sky. Your arms should be stretched down alongside your body, with the arms placed flat on the mat.
- Draw up your knees and bend them so that your feet are brought along the mat closer to your hips. Ensure that your feet are slightly apart, say hip-width.
- Bring up your feet in this fashion until they are almost close enough for you to tickle your heels with your fingertips.
- Maintain distance between your knees throughout this pose. Some find it useful to lace a prop such as a block between their inner thighs to keep them from drawing together.
- At this point, ensure that your arms are relaxed against the floor but in full contact with the mat. The back of your head should be comfortably rested against the mat.
- Breathing in, raise your glutes off the mat, straight up towards the sky.
- Raise your pelvis this way until you reach the top of the movement, at which point your torso should be straight in alignment with your thighs.
- Hold this position for at least 3 to 5 breaths before gently lowering yourself back down and beginning once more.
The bridge pose works by activating your core and his for enhanced stability.
Trikonasana: Triangle Pose
This is a pose that often seems intimidating to many at first glance but is, in truth, one of the most accommodating oses out there. This is especially apparent when looked at in light of how effective it is in helping develop better balance and stability.
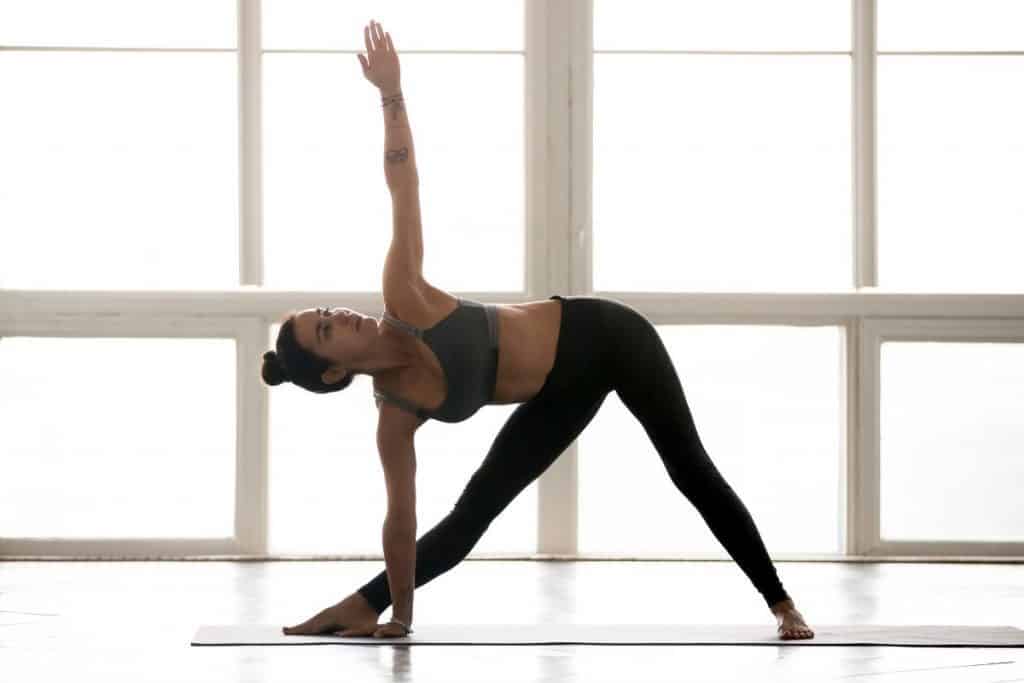
The fact that one’s head and torso end up in the unfamiliar horizontal position instead of the usual upright position offers a further challenge to a person’s sense of orientation and balance.
Here is what you will need to do:
- Spread both feet 2 to 3 feet apart from each other, as long as you can still lace them squarely on the mat at this distance.
- Turn your right foot outwards at a 90-degree angle, and have your left foot turned very slightly inwards as this will help with the range of motion in your hips.
- Raise both of your arms and hold them out to your sides parallel to the ground.
- Gently bend down at the waist towards your right foot until your hand meets your shin or your foot itself.
- Strive to keep your hips squared forward and at level with the ground.
- If you feel capable at this point, turn your head so that you are looking at your left hand, which should now be pointing up towards the ceiling.
- If you feel you’re able to, move further down into the pose so that your palm rests flat on the mat.
- Hold your pose for 5 breaths before repeating the sequence with your left foot dominant.
This pose works by stretching out the practitioner’s hamstrings, obliques, and hips.
Supported Half-Kneeling Gentle Twist
For this pose, you’ll need some sort of support such as a yoga block. The supported half-kneeling gentle twist is a great pose for enhancing one’s balance and stability simultaneously as it targets the thoracic spine region as well as the hi joints.
Getting added mobility in these areas is vital for quick reaction times and flexibility, which play an important role in keeping us on our feet under different circumstances.
Here is what you will need to do:
- Get into a simple kneeling position with your torso straightened upright and your arms at your sides.
- Draw your right leg up so that your foot rests towards the front edge of your mat. You might want to consider having a towel or adding some sort underneath your left knee in case the weight on it gets to be uncomfortable for you.
- Proceed to shift your body weight forwards so that your knee bend deepens, just so much so that your thigh lies parallel to the ground beneath you. Be sure to keep your knee in line with the direction of your foot.
- This is where your prop comes in handy. Take your block and have it laced on the mat right next to your inner right ankle, or simply next to your forward foot.
- Have it at a height where you can reach it without bending downwards too much.
- Go on to firmly place your left hand on the block and see that it is resting solidly on the mat and can bear some weight. Your right hand should be drawn up slightly and rested against your hip.
- Now, inhale and lengthen your spinal column, which should involve you raising the crown of your head upwards and forwards somewhat.
- As you exhale, rotate your midsection to the right, away from the side with the block, while keeping your hands where they are and using the block for additional support.
- You will be twisting through your upper back region while drawing your left shoulder backward and right shoulder forward. You will end up with your chest facing the left side of the mat.
- Keep your side extended with each inhalation you take and try to go deeper into the pose with each exhalation by increasing the angle of rotation as your hips and upper back. However, don’t overdo it. Only go as far as you feel your body can handle.
- Hold your pose for about 5 breaths and repeat the same procedures with the opposite side of your body.
Conclusion
Building up your balance and stability through yoga can be a highly effective method. One doesn’t have to be an athlete to benefit from an increase in these two abilities, as day-to-day living requires balance and stability to be as functionally capable and comfortable as possible.
The elderly or those suffering from debilitating conditions can be particularly in need of an increased balance and stability. This is because they tend to be more prone to falls. This, combined with the fact that even minor falls for them can lead to significant injuries, means that they should avoid them however possible.
Sources
- Wikipedia: List of Asanas
- iFit: Yoga for Core Strength
- Yogafit Studios: Difference Between Balance and Stability
- Yoga Journal: Yoga Poses for Stability and Balance
Sitasyoga.com is a participant in the Amazon Services LLC Associates Program, an affiliate advertising program designed to provide a means for sites to earn advertising fees by advertising and linking to Amazon.com. We also participate in other affiliate programs which compensate us for referring traffic.